Getting Started with QuickBooks
Last updated: January 23, 2026
Overview
Connect QuickBooks to Monk to sync invoices, payments, and customer data between both systems. This guide walks you through connecting your QuickBooks account and completing the initial configuration.
Step 1: Connect QuickBooks
Navigate to Integrations in the left sidebar under the Admin section
Find the QuickBooks card in the Accounting section
Click on the card to start the connection process

You'll be redirected to QuickBooks to authorize the connection:
Log in with your QuickBooks credentials
Select the company you want to connect
Grant Monk the requested permissions
You'll be redirected back to Monk with the integration now connected
Step 2: Configure QuickBooks Settings
After connecting, click the QuickBooks card again to access the configuration page.
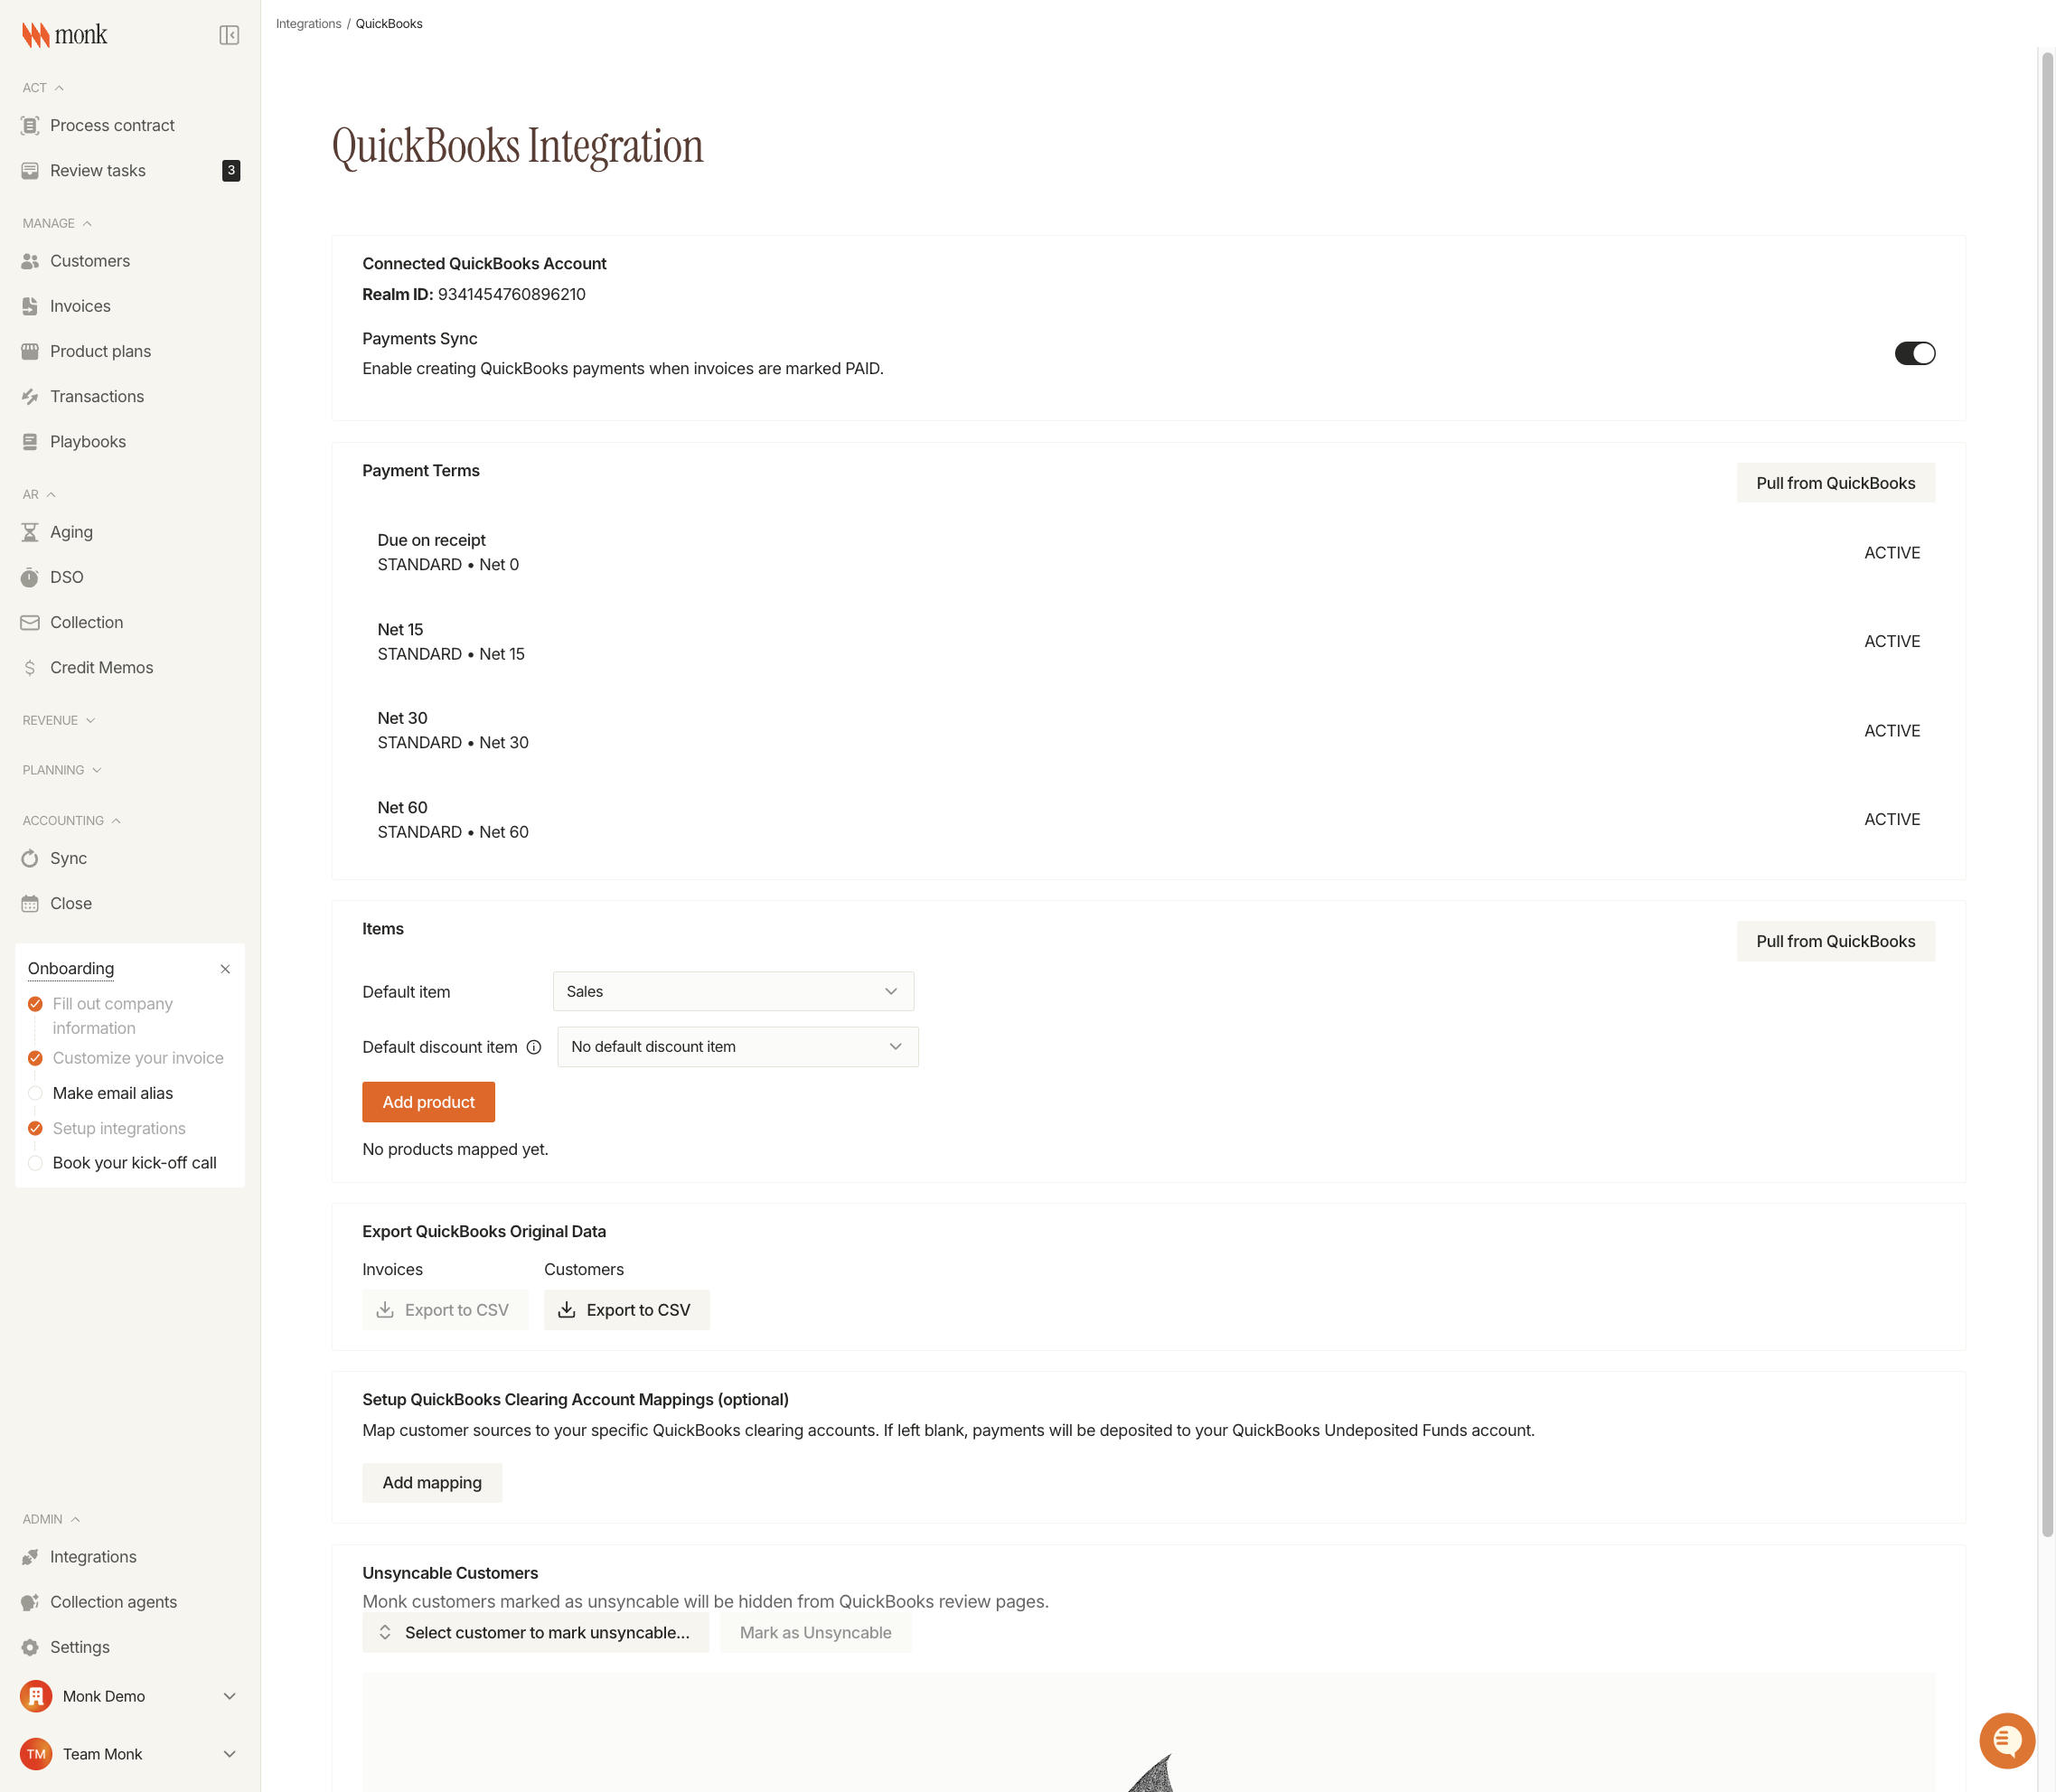
Connected Account Information
The top of the page displays your connected QuickBooks account:
Realm ID - Your unique QuickBooks company identifier
Payments Sync - Toggle to automatically create QuickBooks payments when invoices are marked PAID in Monk
Pull Payment Terms
Payment terms define the due date calculation for invoices. To sync your QuickBooks payment terms:
Find the Payment Terms card
Click Pull from QuickBooks
Your terms (Net 15, Net 30, Net 60, etc.) will appear in the list
Configure Items
Items are required for syncing invoice line items to QuickBooks. Set up your item mappings:
Click Pull from QuickBooks in the Items card to fetch available items
Set a Default Item - This item will be used for all line items that don't have a specific mapping
Optionally set a Default Discount Item for discount line items
Use Add product to create specific mappings between Monk products and QuickBooks items
Step 3: Understand the Sync Workflow
Navigate to Sync in the left sidebar to access the accounting sync page.

The Sync page has five tabs for managing invoices:
Tab | Purpose |
Connected | Invoices already synced to QuickBooks |
Import | Pull invoices FROM QuickBooks into Monk |
Export (New) | Push NEW invoices TO QuickBooks |
Export (Updated) | Push UPDATED invoices to QuickBooks |
Unsyncable | Invoices marked as unsyncable |
Optional Configuration
Clearing Account Mappings
Map customer sources (like Stripe) to specific QuickBooks clearing accounts. If left blank, payments are deposited to your QuickBooks Undeposited Funds account.
In the QuickBooks Integration page, find Setup QuickBooks Clearing Account Mappings
Click Add mapping
Select the customer source and corresponding clearing account
Unsyncable Customers
Mark specific Monk customers as unsyncable to hide them from QuickBooks review pages:
Use the customer search dropdown in the Unsyncable Customers section
Select the customer
Click Mark as Unsyncable
Troubleshooting
Items Not Appearing
If QuickBooks items don't appear after clicking "Pull from QuickBooks:"
Verify your QuickBooks account has Service or Inventory type items created
Check that your QuickBooks user has permission to view items
Try disconnecting and reconnecting the integration
Payments Not Creating
If payments aren't being created when invoices are marked PAID:
Ensure the Payments Sync toggle is enabled on the QuickBooks Integration page
Verify the customer exists in QuickBooks