Creating a Custom Playbook
Last updated: January 24, 2026
Overview
Custom playbooks allow you to build tailored accounts receivable automation workflows from scratch. Unlike pre-built templates, custom playbooks give you complete control over the conditions and actions that determine how your collection conversations are handled.
Step 1: Create a New Playbook
Navigate to Playbooks from the main navigation menu, then click the Create Playbook button in the top right corner.
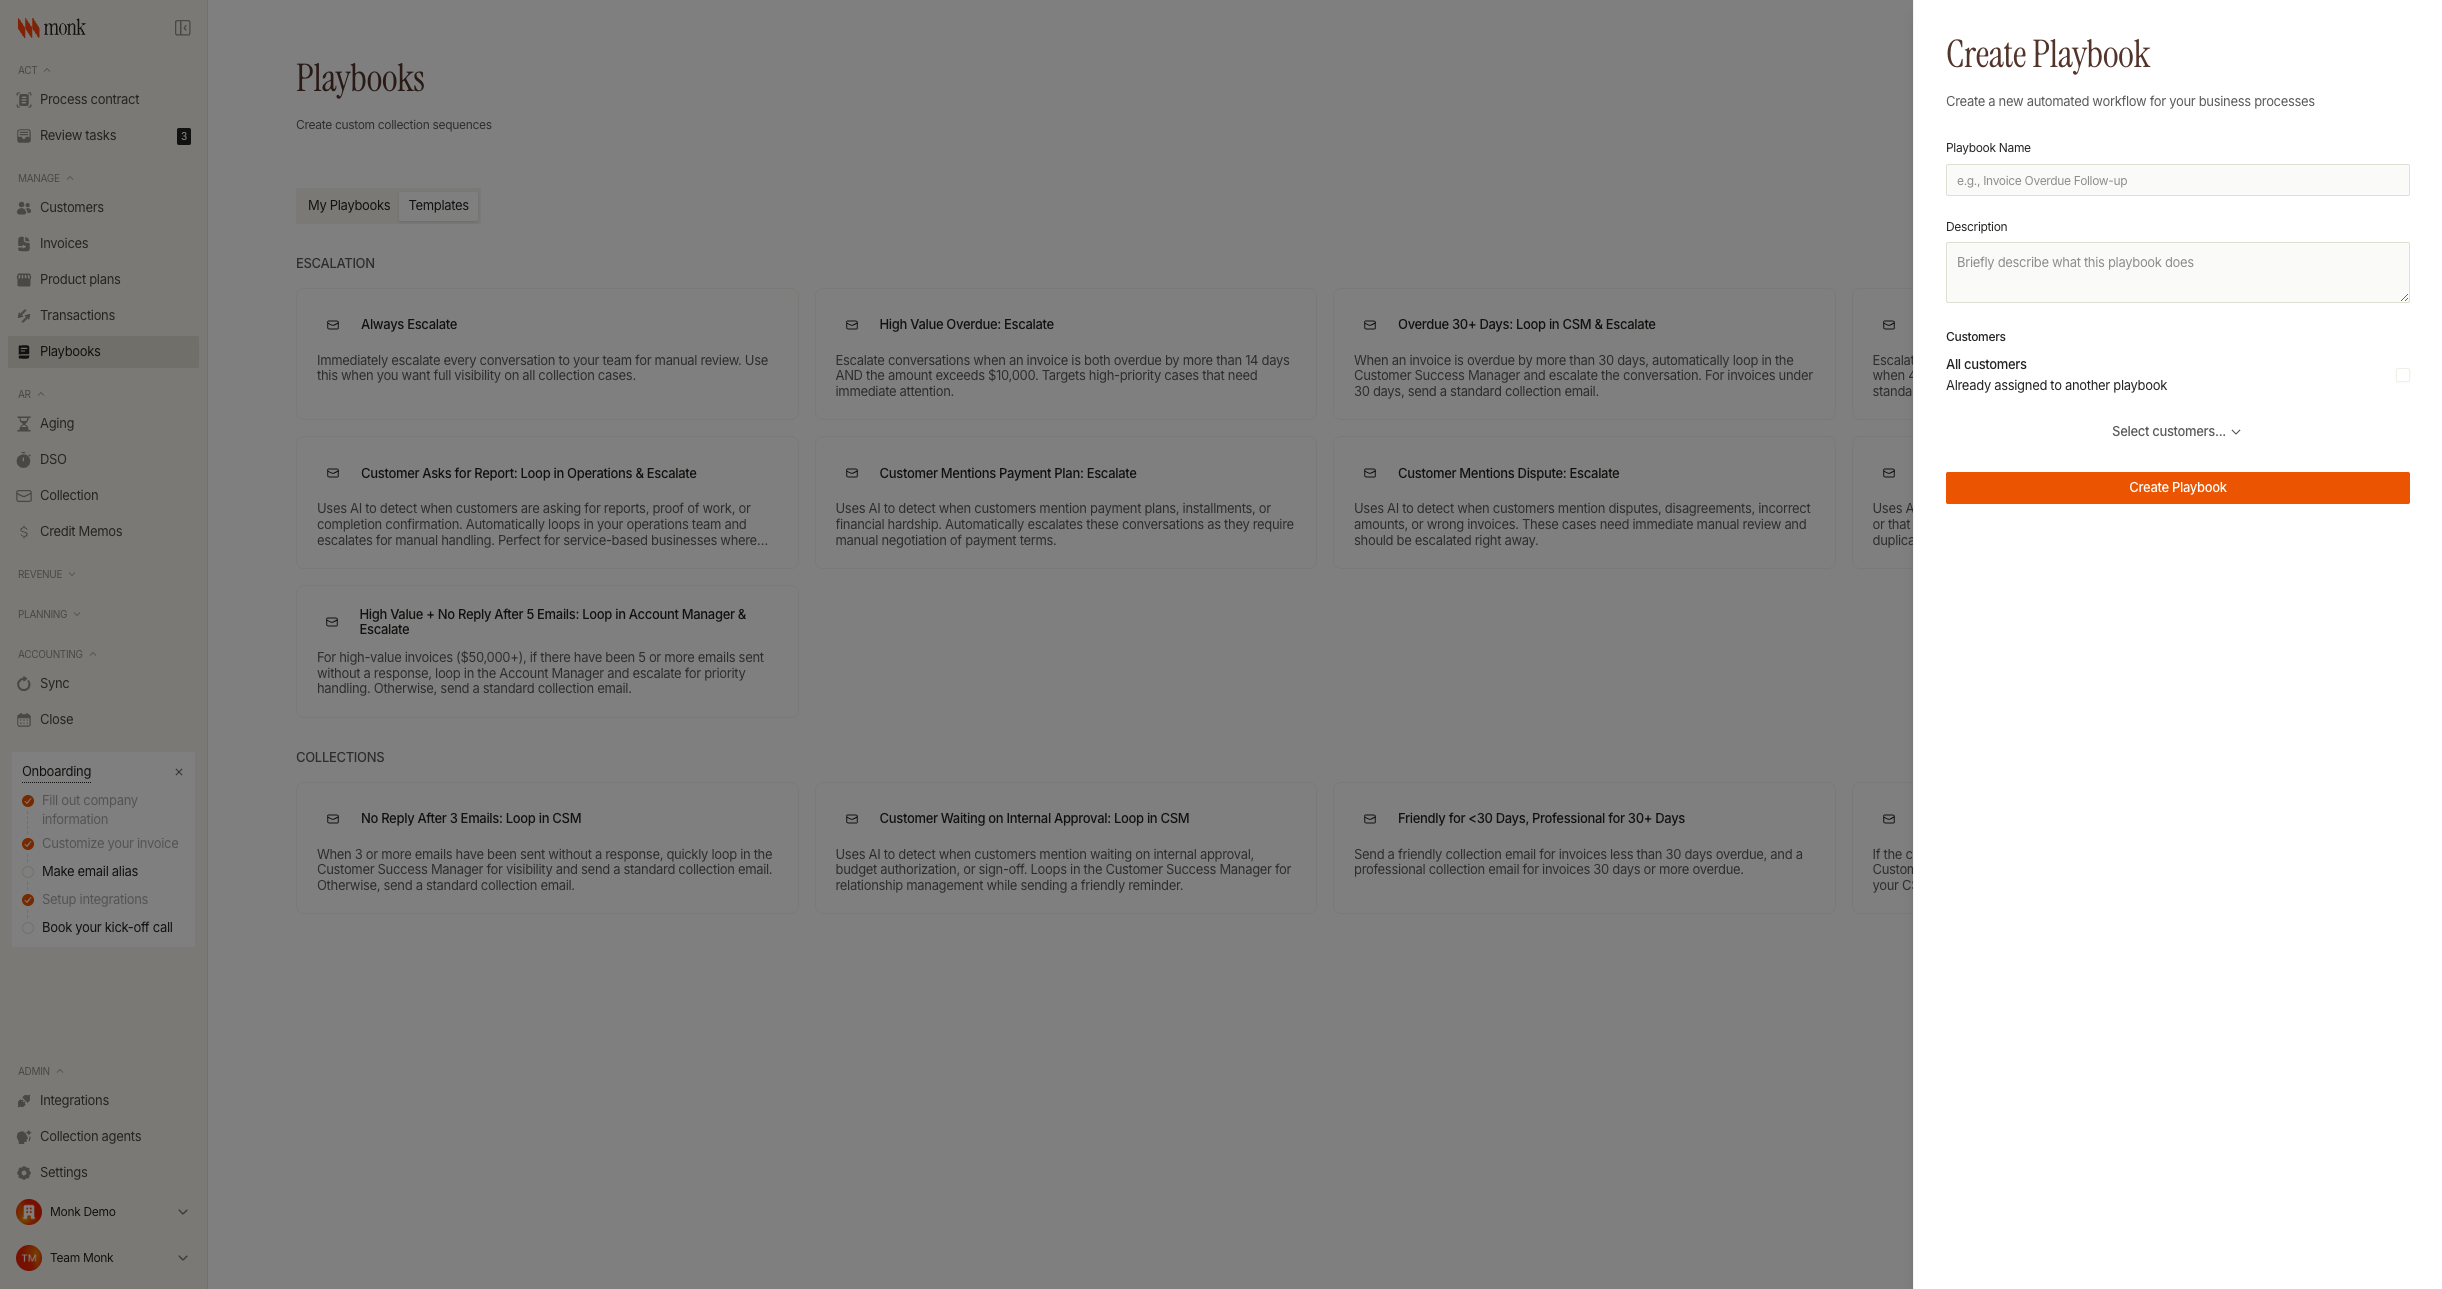
Fill in the playbook details:
Field | Description |
Playbook Name | A descriptive name for your workflow (e.g., "High Value Escalation Workflow") |
Description | Brief explanation of what the playbook does |
Customers | Choose "All customers" or select specific customers |
Click Create Playbook to proceed to the workflow editor.
Important: Each customer can only be assigned to one active playbook at a time. If a customer is already in another playbook, they will appear as "In other playbook" and cannot be selected.
Step 2: Access the Workflow Editor
After creating your playbook, you'll be taken to the Workflow Editor. This is where you define the logic that determines what happens during collection conversations.
The editor has three main areas:
Area | Purpose |
Main Canvas | Visual representation of your workflow steps |
View Toggle | Switch between "Nested" (tree view) and "Flow View" |
Configuration Sidebar | Edit details of selected steps |
Step 3: Add Your First Step
A custom playbook starts empty. Click Add Step to add your first step:
Option A: Add a Condition
Conditions evaluate data about the invoice or conversation and branch into TRUE/FALSE paths.
Click Add Step > Add Condition
The condition appears in the canvas
Click the condition to configure it in the sidebar
Option B: Add an Action
Actions perform operations like sending emails or escalating conversations.
Click Add Step > Add Action
Select the action type
Configure action settings in the sidebar
Best Practice: Most playbooks start with a condition to evaluate the situation, then branch to appropriate actions.
Step 4: Configure AI Conditions
AI conditions use natural language to evaluate conversation content and customer sentiment.
Condition Type: AI
Select the condition step
Set Condition Type to "AI (Natural Language)"
Enter a descriptive prompt in natural language
Writing Effective AI Prompts
The AI has context on the conversation history, invoice details, and customer information. Write prompts that clearly describe when the condition should evaluate to TRUE.
Good examples:
"Set to true if the customer mentions wanting a payment plan, payment arrangement, or requests to split the payment"
"Set to true if the customer claims they have already paid this invoice"
"Set to true if the customer disputes the charges or questions the invoice amount"
Avoid vague prompts:
"Check if customer is unhappy" (too vague)
"Payment issues" (not a complete condition)
Step 5: Add Actions to Condition Branches
Each condition has TRUE and FALSE branches. Add actions or nested conditions to each branch.
Adding Actions to a Branch
Find the branch label (TRUE or FALSE)
Click Add Step next to the branch
Select an action type
Available Actions
Action | Description | Configuration |
Escalate Conversation | Flags for manual review | Optional reason text |
Send Collection Email | Sends automated collection email | Tone (friendly/professional/firm), Additional recipients |
Loop in Email | Adds CC recipients to future emails | Email addresses |
Step 6: Test Your Playbook
Before activating, test your playbook to verify it works as expected.
Save your changes by clicking Save
Click the Test dropdown
Select a specific customer or let Monk choose randomly
Review the test results
Understanding Test Results
The test runs in dry-run mode - no actual emails are sent or conversations modified. The results show:
Which conditions evaluated to TRUE or FALSE
What actions would be taken
Any configuration issues
Note: You must save changes before testing. The Test button is disabled if you have unsaved changes.
Step 7: Activate Your Playbook
Once satisfied with your configuration:
Ensure all workflow steps are complete (no empty conditions)
Click Save if you have unsaved changes
Click Activate
The playbook will run automatically during scheduled collection cycles.
Deactivating a Playbook
To pause a playbook:
Click Deactivate
The playbook stops running but retains its configuration
Click Activate again to resume
Troubleshooting
"Cannot activate playbook without steps" error
Cause: Your playbook has no configured workflow steps.
Fix: Add at least one condition or action step before activating.
Playbook not running on expected customers
Cause: Customer assignment conflicts or inactive status.
Fix:
Verify the playbook is Active
Check customer targeting includes the expected customers
Remember customers can only be in one active playbook at a time
Condition branches have no available actions
Cause: All action types are already used in this branch.
Fix: Each action type can only appear once per branch. If you need multiple emails, consider restructuring with nested conditions.
AI conditions not evaluating correctly
Cause: Prompt may be ambiguous or not matching customer responses.
Fix:
Make your AI prompt more specific
Use the Test feature to see how conditions evaluate
Consider using expression conditions for precise numeric thresholds
"Cannot save - incomplete steps" error
Cause: A condition has empty TRUE or FALSE branches with no actions.
Fix: Add at least one action to each branch, or delete the incomplete condition.
Best Practices
Start simple: Begin with a single condition and two actions, then add complexity as needed
Test thoroughly: Run tests with different customer scenarios before activating
Use expression conditions for numbers: AI conditions work best for text analysis; use expression conditions for thresholds like days overdue or invoice amounts
Document with descriptions: Use clear playbook names and descriptions so your team understands the workflow
Review regularly: Adjust playbooks based on collection performance metrics